Storing form data from a website in Google Spreadsheets using javascript / React
This article shows how to log contact form data that a user submits through your website into a Google Spreadsheet.

TLDR:
- Set up the API
- Create a blank Google Sheet
- Enable the Sheets API
- Create an API Key
- Create an OAUTH Client ID
- Include the Google Sheets API Javascript
- Program your web form to submit to the sheet with Javascript by following along with this gist.
Rationale
While a Google Spreadsheet is not the place most people would recommend you store important data — it can be a handy way for a lean organization to avoid dealing with databases, CMS, CRMs, etc, and keep information in an interface they are familiar with. That data is also then very easy to transfer to other applications, to share, or to modify using all the formulae that spreadsheets are famous for.
History
The last time I experimented with storing user data from a website in a Google Spreadsheet I was using Tabletop, a library that, to my memory, was constantly having to keep up with all of the changes Google made to its API, and exploiting some clever hacks to pull off the feat.
This time around, I knew using a third party library wouldn’t be an option for my project, so I looked into the state of Google’s Sheets API (currently V4 at the time of this writing). Turns out it’s come a long way, and is very easy to implement.
Setup
We will be submitting data from the contact to a Google Spreadsheet. In order to do so securely, there are 3 things we need:
- A Blank Google Spreadsheet, and that Spreadsheet’s ID
- An API Key
- An OAUTH Client ID
Step 1: Create Your Sheet
When you create a blank spreadsheet in Google Sheet, you can get its ID from the address bar of your browser. It’s the string of random characters after the /d and before the /edit

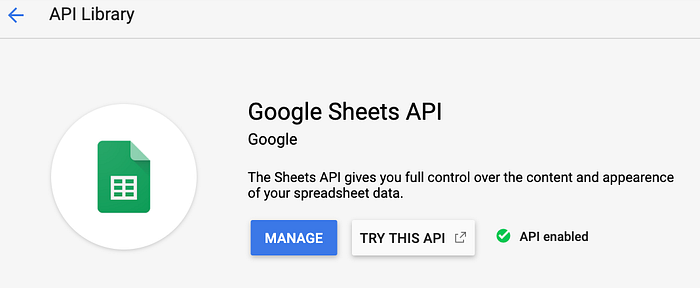
Step 2: Enable the Sheets API
Enable the Sheets API Here, at console.developers.google.com .

From the next screen, search for sheets

On the next screen, click to enable it.
Step 3: Create an API Key
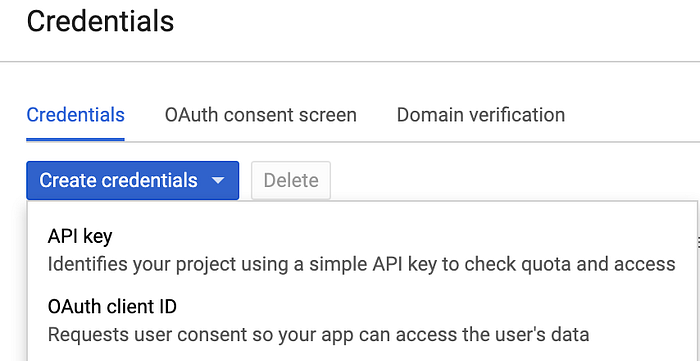
Open the Credentials page in the Google Developers API Console. Click on Create Credentials > API key

For testing, you may not want to restrict the key at this time, but in production, you may want to ensure that only the websites you choose have access to use your API Key. This will prevent someone from interfacing with your data from another website.
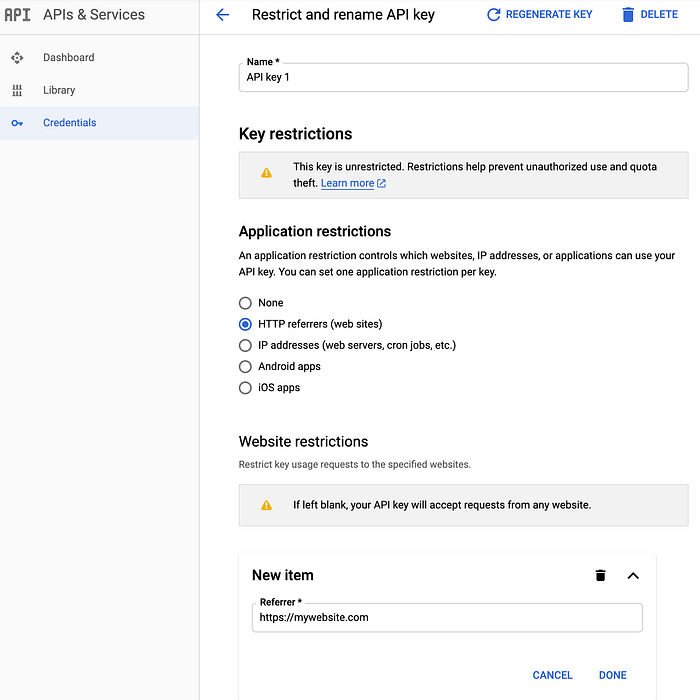
You could also restrict the API Key to only certain Google APIs — which is generally a good idea in order to minimize any potential security vulnerabilities.

When you are done with all of the settings, hit save and copy down your API Key — which shows up on the right side of the page:
Step 4: Generate an OAUTH Client ID
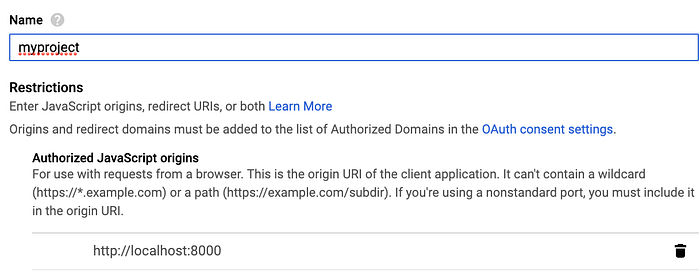
From the Credentials page in the API Console, Click Create Credentials > OAUTH Client ID and choose Web Application . Give the application any name (e.g. myproject).
Enter any domains you wish to restrict the authentication to under Authorized Javascript Origins . One that I always add is http://localhost:8000 , as this is the server address that always gets set up when I run a python simple HTTP server (python -m SimpleHTTPServer from the terminal in mac). This allows your API to run locally.
After you hit Save , copy down the client ID that gets generated.

Now you have all of the security stuff out of the way, and you can get to the fun stuff, hooking up your form to the spreadsheet.
Submitting data from the website contact form to your Google Spreadsheet using Javascript
Step 1: Create a form
Ok, you’ll probably need to know a little bit of javascript for this part — every contact form is different, and I’ll not be covering in detail how to make an actual working contact form, just how to get the data into a sheet when you hit submit.
My form was part of a React App, and uses the modern ES6 Javascript Syntax. It uses the excellent informed library for React to handle validation of all the form fields and call a function when the user hits submit and all the data is validated. At its simplest, your (React) form might look like this:

Here, we’re just importing the library and making a form that collects a person’s first name. We import the library Form and Text components, create a simple react class, and render out the form with a submit button. The form doesn’t do anything yet.
Step 1: Store all your sheets API credentials in variables
You’ll have your own values here, but they’ll look something like this:
Only the SCOPE will be the same.

Place those at the top of your file, before the export default class stuff, but after the imports .
Step 3: Hook your submit button up to a function
Remember that <Form>tag we made? Let’s hook it up to a function

And make the function above our render method:

This would normally work for a react component, but the informed plugin doesn’t know how to tie its own API to the React Class we’re making, unless we bind its functions, like this:

Step 4: Make that submit button do something:
Ok, there’s a lot in this step, and you can learn more about the API itself in this documentation, but here’s the gist of what we want to do:
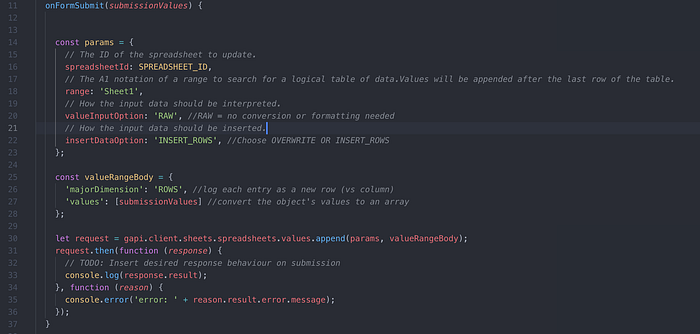
First, the sheets API gives you a bunch of options (params). Some of them that we’re using are:
- range: We’ve just got
Sheet1here, because we don’t want to submit to multiple sheets within our spreadsheet.Sheet1is the default name of your first sheet in any Google Spreadsheet, so as long as you haven’t changed this, you’re good! - valueInputOption:
RAW. Your options here are Raw or user entered. From the docs:
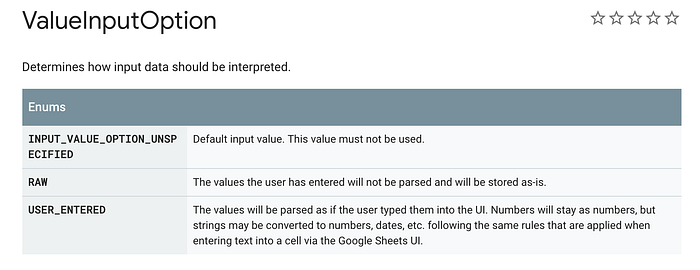
USER_ENTERED would attempt to clean up any user submitted data for us. I’ve done all that work on my end through validation in Javascript, so I just want the raw data.
- insertDataOption:
rows— this is the default, and it just means each entry should take up one row in our spreadsheet (versus 1 column).
The valueRangeBody variable is a javascript object that contains the values that were submitted to our form, and the direction in which we want to place them (again, ROWS ).
We call the sheets API append functionality to add a new entry to our spreadsheet (you could use update if you were only ever updating a single entry in the spreadsheet), pass it our options (params) and valueRangeBody information, and then wait for a response.
You’d have to put in the behavior you want after you get a response (some sort of onscreen “success” message perhaps?), but in this example we’ll just log that success response (or error) out to the console.
Step 5: Initialize the API
To make all that code we just wrote talk to Google, we need to initialize the Sheets . We’ll do that when our React class loads (via the componentDidMount function, which gets called automatically).

The handleClientLoad function needs to signal to Google that we want to use Google authorization:

When this happens, it calls another function, this.initClient
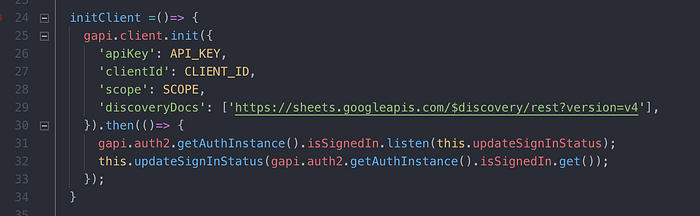
This is where we pass Google all of our API credentials so it knows we’re authorized to store data in our sheet. That updateSignInStatus callback function within listen doesn’t need to be there for our example, but ordinarily this would be a good time to set some React state variables so we know the user is signed in successfully.
But none of this will work unless we actually include the Google Sheets API itself!
Step 6: Include the Google Sheets API codebase
This is how we add Google javascript functionality to our own javascript. We would do it outside of this javascript class, and include it in a <script> tag somewhere in the HTML of our page (the bottom, before the </body> is always a popular option:
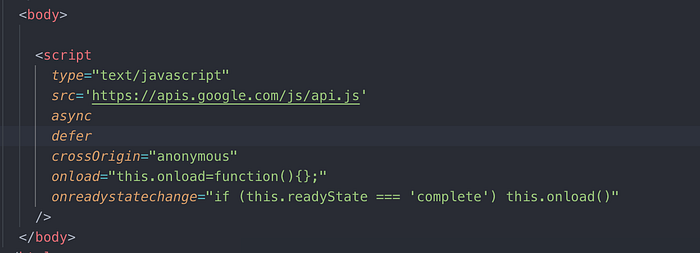
There’s a bunch of props here in this script tag, but basically the src tells us where to find Google’s javascript. The crossOrigin property just makes it clear that we’re ok with the sheets API working anywhere someone can host our codebase. And the onreadystatechange property just calls an onload function — we don’t really need that to do anything in this example.
Step 7: Test it!
- Start up your webserver and go to your form page.
- Depending on how you shared your spreadsheet from Google, you should be asked to use Google’s login functionality. As long as you have a Google account, you’re good to go once you login successfully.
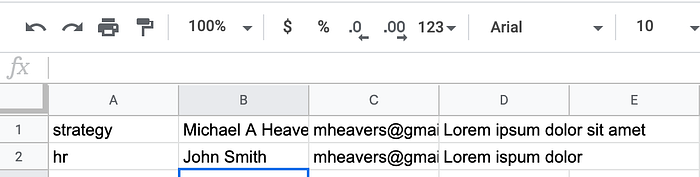
- enter some data into your form, and hit submit. and go take a look at Google Sheets. The form data should be logging straight to Google Sheets. Here’s mine:
Hope this helps you get started. Here’s the full Javascript: